![[Project] Youtube Party 만들기 (4) - socket 모듈 만들기 (Nextjs, Express로 채팅 기능 구현)](https://img1.daumcdn.net/thumb/R750x0/?scode=mtistory2&fname=https%3A%2F%2Fblog.kakaocdn.net%2Fdn%2FqVT8W%2FbtsyVgBD8cT%2FLpoVx89iHi8RCLrmCuPIwK%2Fimg.png)
개요
저번 글에서는 Express로 만든 방 번호 생성 API와 Next의 ServerSideProps의 기능을 이용해 url의 roomId가 유효하지 않다면 리다이렉트 시키는 기능까지 구현해봤다.
[Project] Youtube Party 만들기 (3) - Nextjs 채팅방 페이지로 이동하는 기능 만들기 +) getServerSideProps 리다
개요 저번 "(2) - Express 디렉토리 구조 설정, 채팅 room 생성 API 만들기" 편에서는 채팅방을 생성하는 서버측 코드를 작성했다. [Project] Youtube Party 만들기 (2) - Express 디렉토리 구조 설정, 채팅 room 생
bluepebble25.tistory.com
이번 게시글은 그렇게 리다이렉트되지 않고 채팅방 페이지에 무사히 입장했다면 채팅을 할 수 있는 기능을 만들어 볼 것이다.
간단한 socket 이벤트라면 app.ts에 바로 작성하겠지만, 소켓에 이벤트를 여러개 등록하거나 코드의 독립성을 보장하고 싶다면 모듈로 분리하는게 낫다.
socket 모듈 작성
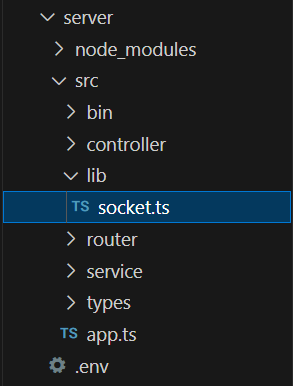
lib이라는 폴더 안에 socket.ts 파일을 만들었다.
socket.ts 전체 코드
// lib/socket.ts
import { Server, Socket } from 'socket.io';
import server from '../app';
import { User } from '../service/users';
import { getRoom } from '../service/rooms';
import { Message, ServerMessage } from '../service/message';

interface CustomSocket extends Socket {
  roomId: string;
  userId: string;
}

type EventType = 'joinRoom' | 'disconnect' | 'message';

const io = new Server(server, {
  cors: {
    origin: '*',
  },
});

const chat = io.of('/chat');

export function initSocket(io) {
  chat.on('connection', (socket: CustomSocket) => {
    const { watchDisconnect, watchJoin, watchMessage } =
      createSocketHandler(socket);

    watchJoin();
    watchMessage();
    watchDisconnect();
  });
}

function createSocketHandler(socket: CustomSocket) {
  function detectEvent(event: EventType, func) {
    socket.on(event, func);
  }

  function chatToRoom(event: string, message: Message | ServerMessage) {
    const { roomId } = message;
    console.log('room에 emit합니다.');
    chat.to(roomId).emit(event, message);
  }

  const watchJoin = () => {
    detectEvent('joinRoom', (data) => {
      const roomId = (socket.roomId = data.roomId);
      const userId = (socket.userId = data.userId);
      // 나중에 db에서 userId 바탕으로 닉네임 등을 가져오는 로직도 추가하기

      socket.join(roomId);

      const serverMessage = new ServerMessage(roomId, 'join', { userId });

      console.log(
        `메시지 이벤트 발생: ${JSON.stringify(serverMessage.content)}`
      );
      chatToRoom('message', serverMessage);

      // 유저를 방에 추가
      const newUser = new User(userId, socket.id);
      const room = getRoom(roomId);
      room.addUser(newUser);
    });
  };

  const watchMessage = () => {
    detectEvent('message', (data) => {
      console.log('받은 메시지:', data);
      chatToRoom('message', data);
    });
  };

  const watchDisconnect = () => {
    detectEvent('disconnect', () => {
      const roomId = socket.roomId;
      const socketId = socket.id;

      const room = getRoom(roomId);
      room.removeUser(socketId);
    });
  };

  };

  return {
    watchJoin,
    watchMessage,
    watchDisconnect,
  };
}

export { io };
Message, ServerMessage 클래스
message와 serverMessage 정의 클래스. 서버 메시지는 인스턴스를 생성할 때 어떤 eventType를 넣느냐에 따라 그에 맞는 메시지를 자동으로 생성해 갖고 있음. new ServerMessage(roomId, 'join', {userId})를 하면 자동으로 '${userId}가 입장했습니다' 메시지를 생성하는 식. 이 메시지를 chatToRoom('message', serverMessage) 와 같이 보내면 된다.
메시지를 생성할 때 userId나 time 옵션이 있는데 지금은 수동으로 각 eventType에 필요한 인자를 찾아서 넣는 방식이다.
이것은 추후에 ServerMessageOpts를 EventType을 extends한 제네릭 형태로 리팩토링하여 자동완성이 용이하게 할 예정
// service/message.ts
import { User } from './users';

export class Message {
  roomId: string;
  userId: string;
  content: string;

  constructor(roomId: string, user: User, content = '') {
    this.roomId = roomId;
    this.userId = user.userId;
    this.content = content;
  }
}

type EventType = 'join' | 'leave' | 'play' | 'pause' | 'jump' | 'newVideo';

interface ServerMessageOpts {
  userId?: string;
  time?: number;
}

export class ServerMessage {
  roomId: string;
  content: string;

  constructor(roomId: string, eventType: EventType, opts: ServerMessageOpts) {
    this.roomId = roomId;
    this.content = this.generateServerMessage(eventType, opts);
  }

  generateServerMessage(eventType: string, opts: ServerMessageOpts) {
    let content = '';
    const { userId, time } = opts;

    switch (eventType) {
      case 'join':
        content = `${userId}가 입장했습니다.`;
        break;
      case 'leave':
        content = `${userId}가 떠났습니다.`;
        break;
      case 'play':
        content = `${userId}가 영상을 재생했습니다.`;
        break;
      case 'pause':
        content = `${userId}가 영상을 멈췄습니다`;
        break;
      case 'jump':
        content = `${userId}가 ${time}구간으로 점프했습니다.`;
        break;
      case 'newVideo':
        content = `${userId}가 새 비디오를 재생했습니다`;
        break;
    }

    return content;
  }
}
socket 모듈 사용 방법 및 코드 해설
1) socket 서버 생성, 소켓 서버 listening 방법
es module 방식을 사용해 소켓 서버를 생성하려면 app.ts로 만든 server와 socket.io의 Server 객체를 불러와서 Server 인스턴스를 생성하면 된다.
그리고 소켓 서버도 localhost:3000 (클라이언트)과 localhost:5000 (서버) 사이에 통신을 하는 것이므로 CORS가 적용된다. 따라서 new Server()를 할 때 CORS 옵션도 적어준다.
그리고 io를 이용해 /chat 이라는 namespace를 생성한다.
// lib/socket.ts
import { Server } from 'socket.io';
import server from '../app';

const io = new Server(server, {
  cors: {
    origin: '*',
  },
});

const chat = io.of('/chat');

function initSocket(io) {
// ...
}

function createSocketHandler(socket) {
// ...
}

export { io };
다만 const io = new Server(server); 를 했다고 해서 소켓 서버가 성공적으로 작동할 거라는 착각을 해서는 안된다.
여기까지는 socket.io 서버를 생성한 다음 Express 서버와 연결한 것이다.
실제로 서버를 listening 시키기 위해 bin/www.js 라고 하는 server를 가동하는 최상위 파일로 가서 io.listen(server) 시키는 것 까지 마쳐야 잘 작동한다.
// bin/www.js
const PORT = process.env.PORT || '5000';

import server from '../app';
import { io } from '../lib/socket';

server.listen(PORT, () => {
  console.log(`Server is running on port${PORT}`);
});

io.listen(server);
2) initSocket 함수 작성, initSocket 실행하기
initSocket 함수는 소켓 모듈을 초기화하는 역할을 한다.
createSocketHandler 함수는 소켓 이벤트 핸들러 생성 함수인데, 'join', 이나 'disconnect' 등의 소켓 이벤트 함수들을 생성해 반환한다.
socketInit 함수는 이런 식으로 받아온 소켓 이벤트를 실행해서 등록하는 역할을 한다.
// lib/socket.ts
export function initSocket(io) {
  chat.on('connection', (socket: CustomSocket) => {
    const { watchDisconnect, watchJoin, watchMessage, watchVideoEvents } =
      createSocketHandler(socket);

    watchJoin();
    watchMessage();
    watchDisconnect();
    watchVideoEvents();
  });
}
initSocket을 사용하는 방법은 app.ts에서 initSocket을 import해서 실행하는 것이다.
initSocket 함수를 하나만 실행하면 소켓 이벤트 등록을 자동으로 해주도록 모듈을 만든 것이다.
// app.ts
import express from 'express';
import http from 'http';
import cors from 'cors';

import { router as rooms } from './router/rooms';
import { initSocket } from './lib/socket';

const app = express();
const server = http.createServer(app);

app.use('/api/rooms', rooms);

initSocket(server);

export default server;
createSocketHandler 함수
createSocketHandler에는 detectEvent 함수와 chatToRoom 함수가 있는데, 이 두 함수는 이벤트를 감지 (socket.on), 채팅을 전송(emit) 하는 기본 동작을 추상화 한 것이다. 이벤트 감지나 메시지 전송을 할 때 쓰면 된다.
function 키워드로 만든 함수는 기본 동작 함수이고,
소켓 이벤트 등록 함수는 이와 구별되게 하려고 const watchJoin = () => {} 와 같이 화살표 함수로 작성했다.
socket.on으로 바로 이벤트를 등록하는게 아니라 한번 detectEvent 처럼 추상화 하고,
한 번 더 watchJoin처럼 감싸서 이벤트 핸들러 함수로 추상화 했다.
이렇게 추상화 한 함수를 createSocketHandler에서 return 하도록 해서, initSocket에서 간편하게 이벤트 핸들러 함수들을 등록할 수 있다.
CustomSocket 인터페이스는 'joinRoom' 이벤트에서 socket 객체 자체에 roomId와 userId를 저장하는 부분이 있는데 그것을 위해 Socket을 extends하여 만든 객체이다. 또한 EventType은 detectEvent나 chatToRoom의 event 인자를 입력할 때 자동완성을 용이하게 하려고 만든 타입이다.
interface CustomSocket extends Socket {
  roomId: string;
  userId: string;
}

type EventType = 'joinRoom' | 'disconnect' | 'message';

// ... function initSocket(io) {}

function createSocketHandler(socket: CustomSocket) {
  function detectEvent(event: EventType, func) {
    socket.on(event, func);
  }

// 채팅의 타입이 다양해질 수 있기에 event의 타입은 일단 string으로 지정함
  function chatToRoom(event: string, message: Message | ServerMessage) {
    const { roomId } = message;
    console.log('room에 emit합니다.');
    chat.to(roomId).emit(event, message);
  }

  const watchJoin = () => {
    detectEvent('joinRoom', (data) => {
      const roomId = (socket.roomId = data.roomId);
      const userId = (socket.userId = data.userId);
      // 나중에 db에서 userId 바탕으로 닉네임 등을 가져오는 로직도 추가하기

      socket.join(roomId);

      const serverMessage = new ServerMessage(roomId, 'join', { userId });

      console.log(
        `메시지 이벤트 발생: ${JSON.stringify(serverMessage.content)}`
      );
      chatToRoom('message', serverMessage);

      // 유저를 방에 추가
      const newUser = new User(userId, socket.id);
      const room = getRoom(roomId);
      room.addUser(newUser);
    });
  };

  const watchMessage = () => {
    detectEvent('message', (data) => {
      console.log('받은 메시지:', data);
      chatToRoom('message', data);
    });
  };

  const watchDisconnect = () => {
    detectEvent('disconnect', () => {
      const roomId = socket.roomId;
      const socketId = socket.id;

      const room = getRoom(roomId);
      room.removeUser(socketId);
    });
  };

  return {
    watchJoin,
    watchMessage,
    watchDisconnect,
  };
}
이렇게 소켓 서버 준비를 끝냈으니 연결이 잘 되는지 테스트해야 한다. 다음 글에서는 Next.js에서 클라이언트 측 소켓 채팅을 구현하는 방법을 다뤄보겠다.
'프로젝트 과정 기록' 카테고리의 다른 글
| [Project] Youtube Party 만들기 (3) - Nextjs 채팅방 페이지로 이동하는 기능 만들기 +) getServerSideProps 리다이렉트 (1) | 2023.10.17 |
|---|---|
| [Project] Youtube Party 만들기 (2) - Express 디렉토리 구조 설정, 채팅 room 생성 API 만들기 (0) | 2023.10.06 |
| [Project] Youtube Party 만들기 (1) - 프로젝트 환경설정 | Nextjs + Typescript + Express (0) | 2023.09.23 |
| [Project] Youtube Party 만들기 - 프로젝트 주제, 컨셉 (0) | 2023.09.22 |
| [React] Chartjs로 막대그래프 그리기 (0) | 2023.08.04 |